If you’ve been growing plants in your apartment for a while, chances are you’ve fallen in love with a few favorites. Maybe your pothos is trailing beautifully, or your spider plant has produced tiny plantlets. Instead of buying more plants, why not propagate the ones you already have?
Propagation is the process of creating new plants from existing ones. It’s a budget-friendly, satisfying way to expand your indoor jungle—and once you learn the basics, it’s surprisingly easy.
This step-by-step guide will walk you through different propagation methods perfect for apartment living, with tips for success even in small spaces.
Why Propagate Your Houseplants?
There are many benefits to propagating your apartment plants:
- Save money: No need to buy more when you can grow your own for free.
- Share with friends: Gift a cutting in a cute pot.
- Control growth: Propagation helps manage oversized or leggy plants.
- Multiply favorites: Grow more of the plants you love.
- Rescue failing plants: Take cuttings from healthy sections if a plant is struggling.
It’s also a great way to learn more about how your plants grow and build confidence as an indoor gardener.
Best Apartment-Friendly Plants for Propagation
Some houseplants are easier to propagate than others. Here are a few beginner-friendly options:
- Pothos
- Spider Plant
- Monstera
- Snake Plant
- ZZ Plant
- Succulents
- Peperomia
- Tradescantia (Wandering Jew)
- Philodendron
- Chinese Money Plant (Pilea peperomioides)
These species respond well to simple propagation methods like stem cuttings, division, or leaf cuttings.
Methods of Propagation for Apartment Gardeners
Depending on the plant, there are several methods of propagation. Here are the most popular ones you can do easily in an apartment setting:
1. Water Propagation
Best for: Pothos, philodendron, monstera, tradescantia, coleus
Steps:
- Take a healthy stem cutting just below a leaf node.
- Remove the lower leaves, leaving a few at the top.
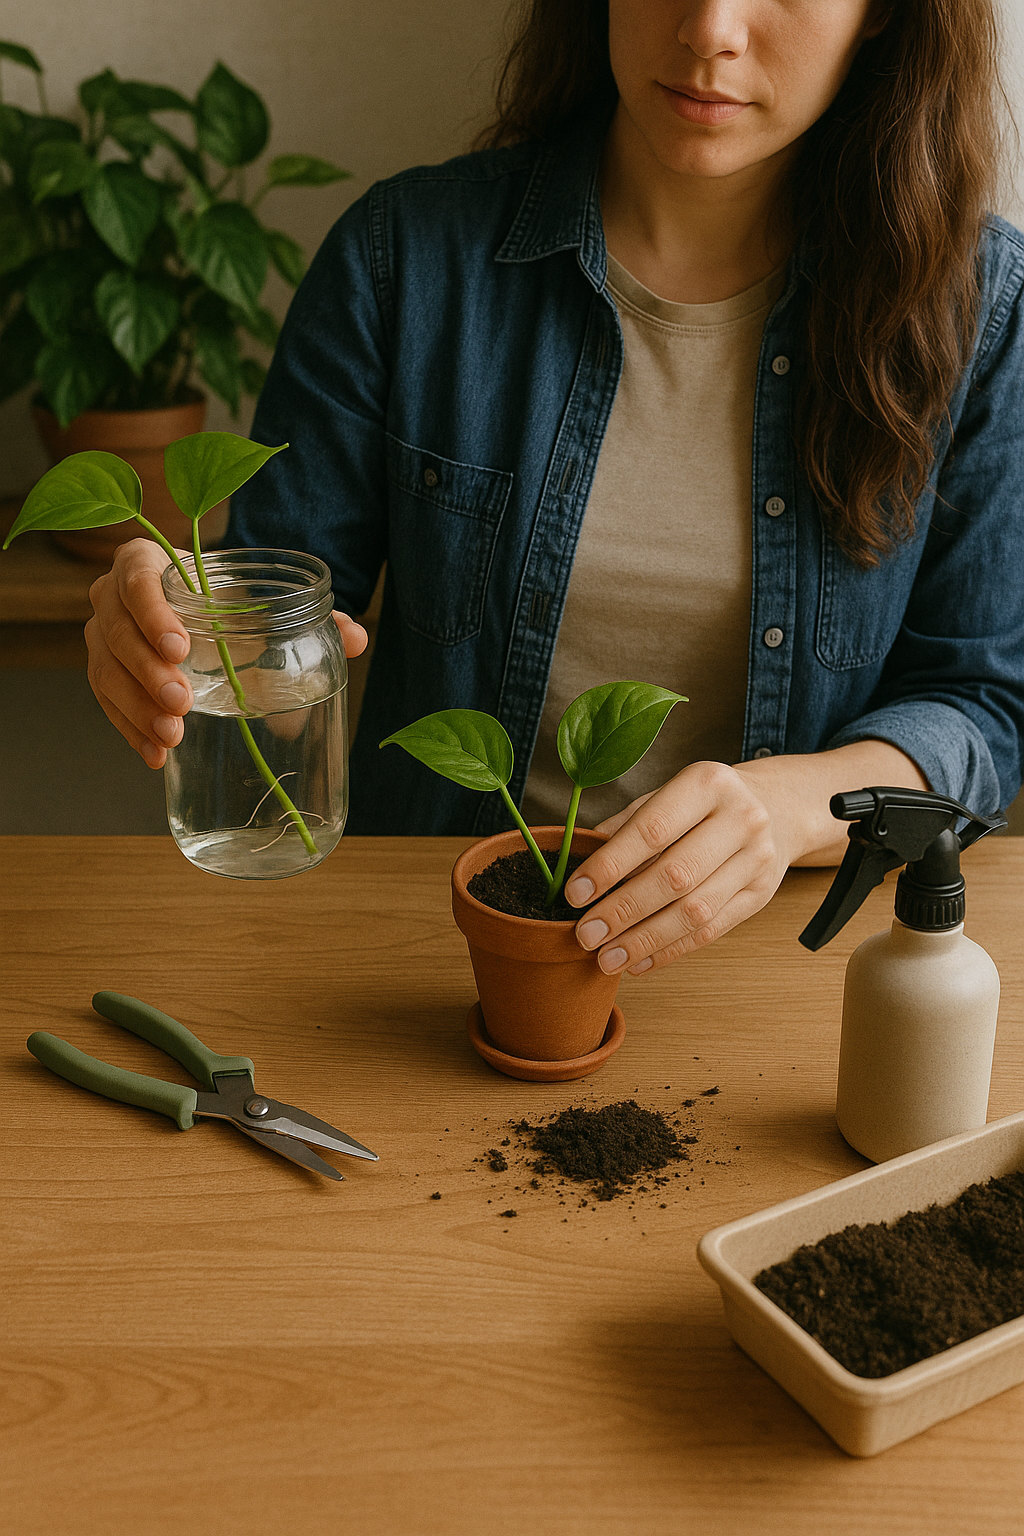
- Place the cutting in a clear jar or glass with clean, room-temperature water.
- Position the container in a bright, indirect light spot.
- Change the water every few days to keep it fresh.
- Wait for roots to form—this can take a week to a few weeks, depending on the plant.
- Once roots are a few inches long, transfer to soil.
Tip: Use a clear container so you can monitor root growth and detect problems early.
2. Soil Propagation
Best for: Snake plant, ZZ plant, succulents, some philodendrons
Steps:
- Cut a healthy section of stem or leaf.
- Let it air dry for a few hours (or days for succulents) to form a callous.
- Insert the cut end into moist potting soil or a mix of soil and perlite.
- Water lightly and place in bright, indirect light.
- Be patient—rooting in soil often takes longer than in water.
Tip: Cover the pot with a plastic bag or dome to increase humidity during early stages.
3. Division
Best for: Snake plant, peace lily, ZZ plant, spider plant
Steps:
- Remove the parent plant from its pot.
- Gently separate clumps or sections with their own roots.
- Replant each section into its own container.
- Water thoroughly and place in low-stress conditions (no direct sun for a few days).
Tip: Always use clean, sharp tools and don’t rush the separation to avoid damaging roots.
4. Leaf Cuttings
Best for: Succulents, peperomia, snake plant
Steps:
- Remove a full, healthy leaf from the parent plant.
- Let it dry and callous over for a day or two.
- Lay the leaf on top of damp soil, or insert the base slightly into the mix.
- Mist occasionally to keep the top layer moist.
- Roots and baby plants will form at the base of the leaf.
Tip: Use shallow trays or small pots to save space on your windowsill or shelf.
Best Practices for Indoor Propagation
No matter which method you choose, follow these best practices to improve your success rate:
- Use sterile tools: Scissors or knives should be clean to prevent disease.
- Label your cuttings: If propagating multiple types, label containers to avoid confusion.
- Be patient: Not all cuttings root at the same pace. Some may take a month or longer.
- Avoid overwatering: Too much moisture can lead to rot.
- Provide warmth: Root development happens faster in warm environments—around 20–24°C (68–75°F).
Propagation Stations: A Stylish Touch for Apartments
Propagation doesn’t have to look messy. You can create a mini propagation station using:
- A row of clear glass jars on a windowsill
- Hanging test tube holders
- Floating shelves with mini pots
- Wooden propagation stands with vials
These displays not only help you track progress—they add charm and personality to your space.
When to Pot Up and What to Expect
Once your cutting develops roots, the next step is planting it in soil:
- Use a light potting mix suitable for the plant type.
- Choose a small pot with drainage holes to avoid overwatering.
- Transition the plant to soil gently—don’t bury fragile roots too deep.
- For the first week or two, keep the new plant in a stable, low-light spot to minimize transplant shock.
Expect some adjustment time as the plant shifts from water to soil, or from cutting to independent growth. Leaf drop or yellowing is normal in the first few days.
Celebrate the Growth!
There’s something incredibly rewarding about growing a new plant from a simple cutting. Propagation is a creative, low-cost way to expand your plant collection and connect more deeply with your indoor garden.
Whether you’re multiplying pothos vines for a fuller look or growing gifts for friends, plant propagation is a satisfying skill that fits perfectly into apartment life.